


The Hangar 9 Giant Scale Ultra Stick is a new take on an old friend. The "Stiks" have been around for decades
and have been liked the whole time. This one is big and comes at a surprisingly good price.
Text, photos and video by Tom Hintz
Posted – 8-22-2018
Thirty-some years ago it was common for people to learn to fly on a SIG Kadet, powered by a 40-glow engine. Just as common was the virtually “standard” second plane back then, the Ugly Stick, often powered by the same 40 glow engine. The Ugly Stick was considerably more aerobatic than the high-wing Kadet yet was easy to fly. That expanded but relatively docile flight envelope made the “Stick” a great plane for fledgling pilots to make the transition from trainer to general flight. I personally wore out two Ugly Sticks in my early years of flying RC.
It seems only natural that the core Ugly Stick concept would make the jump to today’s ARF giant scale planes. The Hangar 9 Ultra Stick makes a perfect “second” giant scale plane or just an all-around fun airframe. Considering all that, it was just natural that I get one. After all, it is tradition.
The Hangar 9 Ultra Stick has a wingspan of 80.75” (205cm) and is 74” (188 cm) long. Its listed flight weight is 12-14 lbs (5.4 - 6.35kg). That anticipated weight could be somewhat of a moving target with the large range of engines and electronics that are compatible with a model of this size. However, the generous wing size and lift capacity will let the Hangar 9 Ultra Stick fly well within sight of either end of that weight range.
The Hangar 9 Ultra Stick appears to have been “massaged” a bit during the update design process. The vertical stabilizer lost the rounded shape and has been replaced by a more conventional profile that should enhance rudder response and predictability. The fuselage retains its square, slab-sided shape but looks longer to me, especially the tail section from the trailing edge of the wing on back. Perhaps that modification is meant to further enhance the response of the tail control surfaces. I love a plane with good rudder authority and the Hangar 9 Ultra Stick looks like that will be part of its flight envelope.
While the spirit of the old Ugly Sticks remains, the new airframe takes full advantage of modern CNC/laser cutting of todays’ light plywood and balsa parts and jig-based factory assembly. We have always known that the lighter and more rigid an airframe is, the better it will fly. Hangar 9 has mastered the light and strong thing, evidenced by how well all their planes fly.
Hangar 9 provides recommendations for a compatible electric power system for the Hangar 9 Ultra Stick, but I am gas all the way in the Hangar 9 Ultra Stick. That said, I have no doubt the Hangar 9 Ultra Stick would fly well with the right electric setup.
I’m not sure why model manufacturers tend to rate a plane like this as compatible with a 30cc engine rather than the seemingly more popular 35cc engines. Perhaps rating the plane for the smaller engine is a subtle way to stroke the male ego when we install a “more power” 35cc engine. It worked on me…
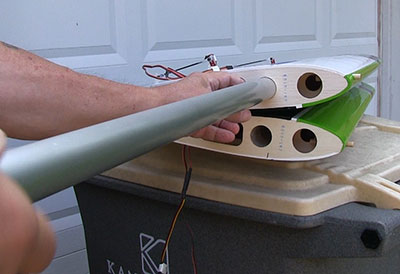
The wing halves are joined with a large, aluminum
tube, then bolted to the fuse.
I’d be lying if I said I was not a little concerned with the shoulder mounted wing on a giant scale, aerobatic plane. I’m not sure why that is as I have tossed my 30cc Valiant around the sky and that is essentially a shoulder mounted wing with no struts. Anyway, the Hangar 9 Ultra Stick has been through its paces – repeatedly – since beginning this Review and it continues to fly well, with both wings.
The wings are supported by a 1-1/4” by 25-1/2” aluminum wing tube. When slipped together a pair of substantial wooden dowels on the leading-edge plug into the fuselage structure and a pair of nylon wing bolts, through a plate finish securing the wing. In addition to being more than strong enough, this system is surprisingly quick to assemble and break down at the field.
I have been spoiled by the often-cavernous giant scale airplane interiors that allowed loading radio and related equipment with a shovel. The Hangar 9 Ultra Stick’s fuselage is rather slender, which forces us to be a bit more deliberate when installing typical giant scale radio and flight gear.
The accuracy of modern jig-based assembly shows itself when mounting the tail feathers on the Hangar 9 Ultra Stick. It was easy to align the horizontal stabilizer with the wing, an important thing if a nice-flying plane is your goal. The tail feather assemblies have plenty of epoxy gluing surfaces to insure they stay where you put them.
Installing the large CA-hinges that secure the control surfaces on the Hangar 9 Ultra Stick is simple. I don’t know why we can repeatedly flex these pieces of plastic without them falling off, but they don’t. The Hangar 9 Ultra Stick uses CA hinges everywhere, including the flaps which is a little different.
The Hangar 9 Ultra Stick comes with the hinge slots cut and the hinges inserted but we must take all that apart, tune up the slots in some cases and then CA the hinges in place. All control surfaces have double-beveled edges at the hinge point so if we pay attention we can end up with virtually no hinge gaps. That is always a good thing for performance.
If there is a down side to the Hangar 9 Ultra Stick control surfaces it is the tiny nuts and bolts used to secure the control horns to them. I know this is nit-picking, and it’s probably not a big deal for most of you but I have little else to whine about with Hangar 9 ARF’s so consider this my “Ah Ha!” moment in this build. I did get one extra backing plate for the control horns and I’m not sending it back!
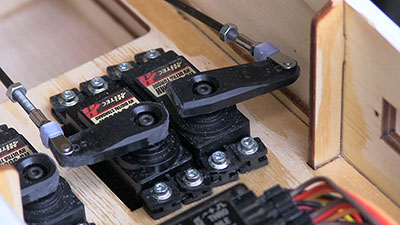
The narrow fuse keeps you honest when installing
servos and servo arms.
Hangar 9 installs guide tubes through the tail section that carry the steel push rods included with this kit from the servos to the tail surfaces. I know the steel rods feel heavy, but the servos aren’t way in back and so overall this setup might be a little lighter. It’s also a bunch easier for us. I had a fleeting thought about making up carbon fiber push rods but that would mean digging the internal tubing out, replacing some of it with bracing to restore structural integrity and after all that, the potential weight savings is likely to be very small. I thought it best to trust Hangar 9 and after a bunch of flights, that was the right decision.
The Hangar 9 Ultra Stick uses traditional formed aluminum main gear. We also find ultra-light, 3-1/2”-tall wheels that mount to the gear with common steel axles. The included axles have a half-moon divot ground near their end to help prevent errant wheels. I also ground a flat down the length of the axles, stopping at their divot. I’m just conditioned to grind that flat but think it is worth the effort.
A friend with the Hangar 9 Ultra Stick warned me of the low ground clearance, especially when using a 20” prop which many 35cc engines can swing. Putting on a 19” prop didn’t help much. As did my friend, I re-bent the main gear so when standing the bare gear on a flat surface the original 7” ground clearance grows to 8”. I had to re-bend the tabs at the end of the gear legs so that they were again square to the mounting surface of the gear. I also used a set of 4” DuBro treaded wheels which increased ground clearance a little more.
The Hangar 9 Ultra Stick comes with painted, fiberglass wheel pants. I seldom use wheel pants in part because I fly off grass and wheel pants just can’t stand up to my incessant touch and goes.
To hit the listed CG, 4-1/2” back from the leading edge I originally added 2-1/8-oz of lead to the firewall and intended to start flying the Hangar 9 Ultra Stick there. However, I found an old Cub spinner with a “heavy” prop washer and installed that and removed the lead. After several flights the Hangar 9 Ultra Stick feels well balanced in the air, so I will leave it this way for a while.
Hangar 9 includes a tiller-style tail wheel assembly that comes with two wheels, one for grass and one for paved runways. So, I did my normal thing and ordered a Miracle Tail Gear in the 60cc-100cc size to replace it. Yes, this size is a bit of overkill for my “30cc” Hangar 9 Ultra Stick but when you do the number of touch and goes that I do, this bit of mechanical extravagance makes sense.
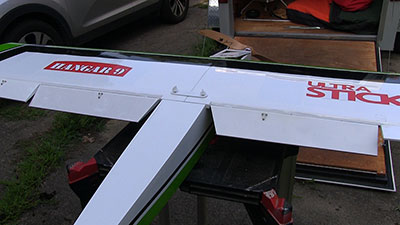
Full flaps on a "Stik" caught my attention.
I always have a transmitter-controlled ignition kill capability and used my favorite, the "Ultra IBEC" Ignition Battery Eliminator Circuit. Tech-Aero, who makes this system even notes that this “kill switch” has become popular enough to let them order larger productions runs (electronics assembly house in the USA) which saves them money that allowed them to drop the price to $39.99. (7-31-2019) That is short money for the safety and convenience it provides.
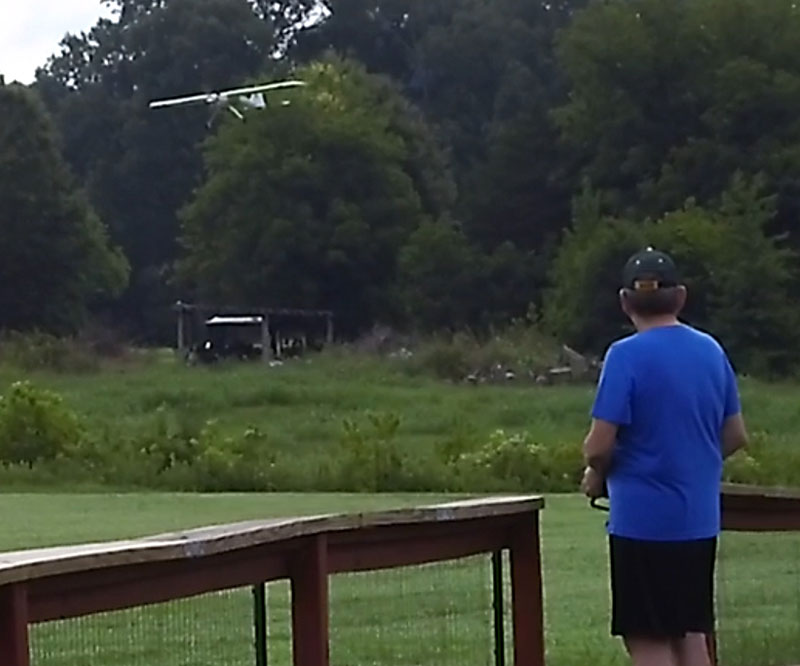
The maiden flight of the Hangar 9 Ultra Stick was uneventful. It needed a good bit of elevator trim and a little right aileron but other than those tweaks, it flew fine. Ground handling is good with surprisingly little thrust influence when I go to full throttle on takeoff. Rudder correction is smooth and predictable.
Despite using my normal “all I can get” throws for the maiden flight the Hangar 9 Ultra Stick was easy to control. Click the dual rates I had set up to the instruction manual-suggested throws and it is smooth without over corrections. The suggested rates are a bit dead for my liking but might help a new pilot grow accustomed to flying it, at least initially. All the controls have a solid feel to them without being touchy.
Newer pilots would do well to stick with middle or low rates until they are used to “seeing” the Hangar 9 Ultra Stick in the sky. The profile of a shoulder-wing airframe such as the “Stick” series can be a little different for newer pilots and perhaps some more experienced ones as well. I have found when teaching people to fly a plane that is “hotter” than their trainer (or last plane) there is a “getting used to it” period where they may have a bit of trouble keeping the plane close enough where it can be seen easily. It’s always easier to lose orientation when they stray out too far.
Adding flaps and the redesigned rudder to the core “Stick” airframe has created a great platform for learning to use both of those often-forgotten controls. The fellow that taught me to fly RC told me that we were going to go all over Wisconsin to hit fun flies with good prizes and we were going to win a bunch of them because we would be cheating – we’d use rudder. A totally legal cheat that made most other pilots wonder what we were “really doing”.
The Hangar 9 Ultra Stick responds to the rudder predictably and requires a considerable amount of rudder input to encourage even minor instability. Where some airframes can be very touchy when even a moderate amount of rudder is applied, the Hangar 9 Ultra Stick has a much wider comfort zone.
With a price tag of just $299.99 (8-17-2018) the Hangar 9 Ultra Stick is a great deal for a plane that is easy to fly or break into giant scale. If you already know the techniques you need, the Hangar 9 Ultra Stick is a ton of fun to fly and doesn’t cost a ton of money to get this giant scale plane off the ground. If you are looking for a plane in this class, the Hangar 9 Ultra Stick is a great choice.
See the Hangar 9 Ultra Stick product page – Click Here
FlyingRC.net Hangar 9 Ultra Stick Protector Set - (scroll down the list)
Tech-Aero IBEC (kill switch) Review on FlyingRC.net – Click Here
Spektrum AR9110 9-Channel DSMX PowerSafe™ Receiver Review on FlyingRC.net – Click Here
Miracle Tail Gear 60cc-100cc Size - Click Here
Have a comment on this Review? –Email Me!