


I was concerned with how well the newest SoloShot would work given all the disappointment getting to this
point.
Text and photos by Tom Hintz
Human Camera person - Clark Ponthier
Robotic Camera person – SoloShot 3
Posted – 8-14-2018
Note: I must admit up front that I was one of the early users of the original SoloShot who grew frustrated with the inability of this robotic cameraman to follow our planes and said so on my site. I sold that earlier SoloShot to a soccer Mom. Suffice it to say that after having used the SoloShot 3 “in the field” it will not be sold to a soccer Mom, or anyone else. I worked hard at not judging this SoloShot 3 with prejudicial hangovers from the first version. I wanted to give the SoloShot 3 a fair shake so undertook this Review with my eyes wide open. Sometimes things get better and we all must recognize that – including myself.
Also, I will not look at the software SoloShot has available in this Review. We have plenty of things to cover in this Review so will look at the software in a later Review after I have time to use those utilities.
The folks at SoloShot repeatedly shot themselves in the proverbial foot by promising lots but delivering two years’ worth of delays and excuses. Sure, there are likely to be problems in the redesign/improvement of a product. I think many people will accept that, albeit grudgingly. It makes as many or more potential purchasers outright angry when they are encouraged to pre-order the SoloShot 3, so they would get in on the early shipments which turn out to be about 2 years down the road. Sounds logical but when that kind of sales pitch is followed by delays rather than shipping, customer attitudes can sour.
When my SoloShot 3 showed up on my doorstep I remember thinking, “this had better be good.” Taking two years longer than advertised to release a still-flawed product could easily have meant the end of the SoloShot idea. It turns out that during the frustrating delays the folks at SoloShot were hammering out a product with tangible improvements, including enhancements that improved the ability to record RC flying more than I expected.
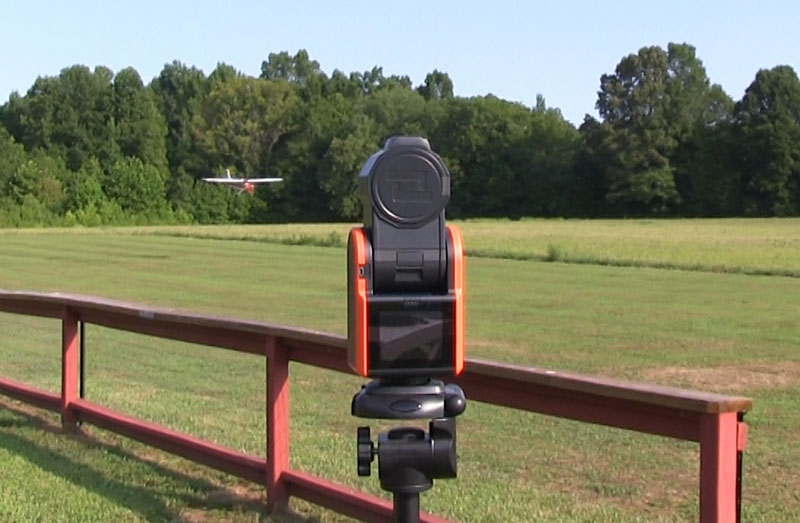
The SoloShot 3 looks very much like its predecessors except for the camera which is now part of the system. There is an option of the Optic25 and the Optic65 cameras with the Optic65 having more zoom range. (The Optic25 may be on its way out as it is now marked as a “closeout” on the SoloShot site.) I was a little concerned about the Optic25 being able to keep the plane “zoomed in” sufficiently for the viewer to see it on the video. That turned out to be way less of a problem than I feared. The Optic65 might be better for lots of uses, perhaps RC planes as well but as you can see in this Review video, the Optic25 does a good job.
The Base handles all the physical tracking, turning the camera to follow the Tag as well as controlling tilt. Both pan and tilt seem faster than previous SoloShot versions and tilt looks to go virtually straight up, again more than before. The motors driving pan and tilt seem to be more precise yet smooth so there is no jerking to be noticed in the video.
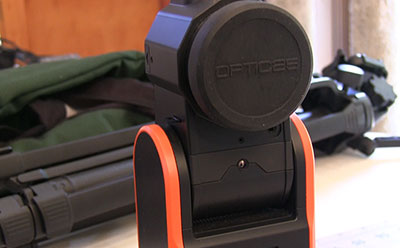
The new camera system got rid of compatibility
issues of the older system.
The Base has a touch screen that makes going through the various setup and settings easy. In my case it took a few times at the field to get comfortable with doing the setup and changing settings. While the screen is clear, in bright sunlight a bit of (hand-held) shade is often needed to see the screens clearly.
Many of the programming features are remembered so once you hit on the combination you like, they return the next time the SoloShot 3 is powered up.
We can, of course, start and stop recording from the Base. However, since many users will be recording themselves we can start and stop recording from the Tag. Being able to just push the button on the Tag is just handy.
One of the welcome surprises for me is how long the built-in batteries last. I leave the SoloShot 3 “On” the whole time we are recording flights. I do start and stop the recording for each flight but otherwise leave the SoloShot 3 on. So far three hours has not discharged the battery to where I received a low battery warning or loss of performance.
The SoloShot 3 comes with a plug-in USB power module and a cord that connects it to the Base for charging. The Tag must be put in its “dock” on the Base, so it is charged with the Base. Charging takes approximately 3 hours depending on how discharged the batteries were from the last use. All this means is that you must remember that you are going flying so plug in the SoloShot 3 several hours before that.
The SoloShot 3 uses Micro SD cards to save the video. I use a 32Gig card (from the approved list on the SoloShot site) and have never come close to maxing it out during one day of recording. Videos are saved in Mp4 format which is compatible with most video editing software. SoloShot offers their own editing software but I have not tried that yet.
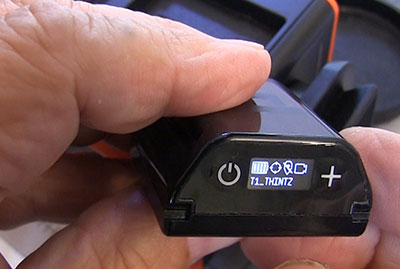
The "tag" looks very much like earlier versions but
promised to work better.
The SoloShot 3 is tracking a small electronic device called the “Tag”, not the plane itself. The Tag locks onto GPS satellites and sends that position to the SoloShot 3 base which uses that info to aim the camera, control zoom and focus. The Tag is roughly 1-5/8” square and 7/8” tall. It weighs 1.40z (40-grams) so doesn’t pose a huge weight or CG challenge.
So far, I have only used the SoloShot 3 Tag mounted on the outside of the plane using the plastic clip that comes with the arm band. I have heard from other RC Flyers that it also works when mounted inside a canopy with nothing but the canopy plastic above it. The only real drawback to mounting the SoloShot 3 Tag inside bolt-secured canopies is not being able to use the Tag button to start and stop recording. A plus for putting the Tag inside the canopy is that a replacement Tag costs right at $150.
One of the frustrating things about previous SoloShot’s was the calibration procedure. The “Walk-about” where you literally had to walk all about the area where the earlier SoloShot would be tracking the Tag. Despite this walking-based procedure the SoloShot apparently worked fine for ground-based targets but again, left RC planes out of the frame. I even contemplated jumping up and down during the “walk-about” when nobody was looking to see if I could improve the vertical tracking. And when nobody was looking, jumping didn’t help either.
The SoloShot 3 calibration routine is much easier since most of it is automatic and it does not include the “walk-about”. You initiate calibration on the touch-screen, then stand back and watch. It can take a few minutes, especially if you did not start the base and Tag and let them “warm up”, a period in which they lock onto GPS satellites. The more satellites the SoloShot 3 latches onto, the better the tracking is which is true of virtually anything that uses GPS. Also, if you move the base it automatically goes into calibration again.
The instructions do say that to improve tracking accuracy doing a bit of the walk about will help focus the base on the Tag more precisely. There is also a manual “fine tuning” to aid tracking but I have not tried that. So far, I have not had to do the walk about thing and can promise that I will whine about it if my SoloShot 3 ever needs it!
So far, my testing has shown the SoloShot 3 is locking onto the Tag with no further “tweaks” to the calibration needed. We did have the base stop tracking the Tag altogether a couple times during the first testing but that could easily have been the result of a setup error on my part, especially since this has not been noted since then. The most recent day at the field showed much better tracking and only one “drop” where the base just gave up and looked down.
The SoloShot 3 can track multiple Tags using speed or distance from the base to decide which one to follow next. You can also track multiple Tags with multiple bases if you absolutely need that. Each additional Tag costs $149.99 (8-13-2018) so I am sure that my needs will not require another Tag or base (and camera) set.
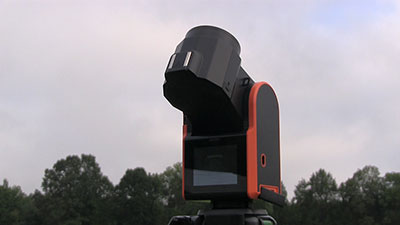
The auto-calibration seemed to remove most of the
walking back and forth, on a good day.
The quality of the raw SoloShot 3 video was a welcome surprise. The Optic25 camera handles the varying light conditions well for a fully automated system. Much of the video for this Review was shot in the early morning. The sun comes up off the right end of my clubs (RCWingers, Mooresville, NC) runway (camera’s right) which complicates getting decent video with a camera aimed in the general direction of that glare.
Because the Optic25 records in mp4 format, most video editing software can make sweeping tweaks if needed. However, the video generated by the SoloShot 3 will more than suffice for most home usage.
The zoom is smooth with a nicely-paced speed that does not distract from the content. The 25X optical zoom is surprisingly effective for RC planes, especially when they are flown within a reasonably-sized “box”. The subject can get a little “far out” appearing depending on the size of the field chosen in setup. The field size is important to how your overall video appears, so it is worth trying the available settings to see which works best with what you want to do with the SoloShot 3.
Be careful when reducing the field size as though it makes the subject larger on the screen it also makes it more difficult to track and to keep in the screen. So far, I use the wide setting with good overall results. The plane can still get out of the frame now and then, but the frequency is low, and the lost footage was seldom important to the overall content.
The previous versions of the SoloShot that I tried simply could not keep up with an RC plane as it went through significant altitude changes. Even seemingly gentle turns tended to leave the earlier SoloShot’s well behind the plane. The SoloShot 3, when set up with a wide frame does much better in keeping up with a moderately fast plane as it goes through simple aerobatics such as loops, rolls and combinations of those maneuvers. For some reason when using a tighter field of view the SoloShot 3 tended to lose the plane when it did a simple aileron roll. Leave everything else the same and select a wider field and the tracking through rolls was much better.
The sweet-spot so far seems to be a wide field of view and the zoom enabled. The plane stays in the frame much better and with zoom on, the plane remains clearly visible and not “out in the distance”. Doing small rudder slides onto the runway for touch and goes is remarkably clear and the zooming smooth.
Near the end of one flight during which the SoloShot 3 had been tracking well the camera tilted down to essentially look at the ground when I landed and stayed there. When I stopped the recording from the Tag, then restarted Recording after refueling the plane the tracking worked fine. I made no other changes to the setup or calibration. I have no idea why for that one flight the camera decided it had to look so much lower than during recorded flights before and after the “problem” flight/recording.
The SoloShot 3 has live streaming capabilities that I have not tried nor have a need for. Part of that is Wi-Fi connectivity that not only enables live Streaming, it makes updating the firmware a no-brainer. The docking for the Tag not only handles charging it but passes updates through to the Tag.
The SoloShot 3, with the updated firmware (released just prior to production of this Review) is dramatically improved in its ability to keep up with RC planes. No, it’s not perfect and yes, the planes can get out of frame now and then, but it is way better than before and produces quality video. Depending on the intended use, the SoloShot 3 video may require editing but so will professionally-shot video. Our focus here is the RC world and, in that realm, the SoloShot 3 does a very good job right out of the box.
I disliked the original SoloShot because of how poorly it worked when tracking the slowest RC planes I had. They fixed that. The SoloShot 3 shows that the folks at SoloShot have been working on improving their product which makes the 2-year-long delay more palatable.
The SoloShot 3 as Reviewed here is selling for $399.00 (8-14-2018) but is marked “(Closeout special, while supplies last.)”. The version with the Optic65 camera (I have not used that camera) is selling for $799.00 (8-14-2018). Cheap just does not apply to the SoloShot 3 but that also can be said about the planes we are tracking. Like anything else, the SoloShot 3 may not be for every RC pilot out there but with the improvements, the SoloShot 3 is worth a hard look if you want to create video of your planes in the air. For most users the SoloShot 3 will involve a small learning curve but before long, you will be compiling a library of your RC exploits and that can be worth more than the cost of a SoloShot 3.
SoloShot 3 product page – Click Here
SoloShot software – Click Here
Have a comment on this Review? –Email Me!