


It's natural to tear into the new plane box but that bit of excitement can cause us to
forget important checks and procedures.
Text, photos and video by Tom Hintz
Posted – 5010-2017
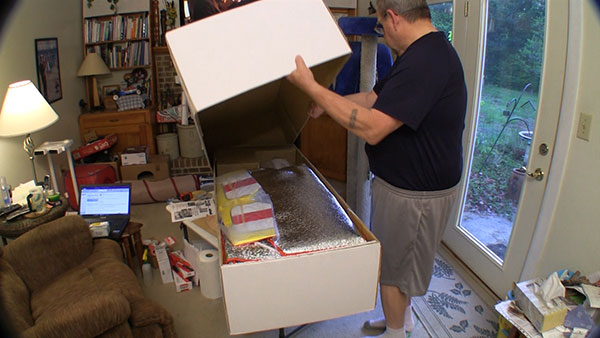
There should be a period in the birth of a new ARF plane between where we dump everything out of the box and assembly begins. Too many of us, me included for a long time, start assembly almost immediately with perhaps a cursory inspection of the major parts. Over the years, I have found that we can prevent a bunch of small to critical problems if we take the time to prepare for the assembly.
I have nearly lost a new plane for this very reason which is why I developed the sequence described here. The widespread contact I have with people through my web site affords me the opportunity to learn from the mistakes of others and include those situations and suggestions in my procedures. Then I can pass them on to you.
The first thing I want to find in a new ARF box is the instruction manual. Most manuals have a list of the major components, some also have a complete list of the included hardware. These lists make a great checkoff sheet that makes it easier to see if anything is missing. Many manuals also have lists of tools and components you will need to finish the model. This lets you gather the needed tools and supplies or to order those you don’t have.
As I unpack the major components and remove them from their shipping covering whether that be plastic bags or foam I give everything a good look to be sure nothing is broken or otherwise damaged. When satisfied I mark that component on the list.
Whenever possible I remove the groups of hardware from the plastic bags most arrive in and put them in a snap-closed plastic box that many of my servos came in. Most times we open a bag of hardware but do not use all of it right away. By putting the hardware in the snap-closed boxes it is easier to find everything you need when returning to work on the model. Since I started doing this I never come up short on hardware either.
Identifying similar or option parts is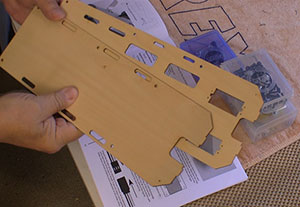
important and cane save time later.
I mark an extra servo box with the name of the model and use that to store fasteners and parts needed for assembling the model at the field. The manufacturers sometimes include extra pieces and I put those in this box as well. I keep these “plane boxes” in the fuselage or the top of my tool box.
I have learned to check how the canopy fits before I begin assembly so I can make any needed tweaks. Most of the time the canopy fits and operates fine but sometimes we find small issues with alignment or irregularities in the mating surfaces that can make securing the canopy difficult or unreliable. This seems to be a rare condition these days with all of the laser-cut pieces and jig-based factory assembly but it is worth the check.
Probably the most common problem relates to the alignment dowels that secure the front of the canopy to the airframe. I have had to work the holes these dowels fit into slightly to let the rest of the canopy align with the upper rails of the airframe properly so the latches engage or the bolts securing it can be inserted straight.
These alignment dowels are subjected to a good bit of engine vibration that can loosen them up with some eventually falling out. I have had this issue in the past so I apply thin CA to the dowels inside and outside where they pass through the framework of the canopy. I try to remember to hit these dowels with another drop of CA now and then during regular maintenance. Canopy’s are expensive, a few drops of CA are not.
Another crucial part of the airframe is the (usually) fiberglass tube that locates the wing tube. This fiberglass tube is subjected to lots of forces as the wings try to flex during the maneuvers we put our planes through. All those forces can compromise the glue bonds securing the tube to the airframe.
I always go over this tube on a new airframe to apply glue to the accessible points around the OUTIDE of the tube. The fit between this sleeve and the wing tube is very close so we cannot get glue to the inside surfaces or wing tube won’t fit through it. I have learned to check this tube occasionally throughout the life of the plane. I go over every joint I can reach with thin
This is also a good time to check the fit of the wing tube into this sleeve. I have found that gently sanding a bevel on the edges of the wing tube sleeve makes it easier to get the tube started. While a tight tube is likely to loosen up a bit with some flight time I will apply baby power to the tube to “slick” it up some to make it easier to get in and out.
CA to stiffen things up and catch not so
glued joints early.
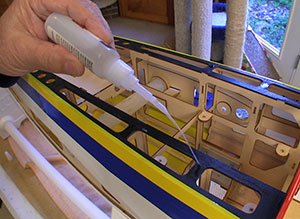
Finding unglued joints in a modern airframe is not all that common but it does happen. Going over every joint we can reach will certainly help fix those but we also want to add strength to the joints that were glued at the factory. Even joints that have been glued well at the factory will benefit from a drop or two of thin CA soaking into the wood around the joint, adding a bit more strength. Where interlocking tabs come through the mating part I try to get thin CA all around that tab. Even if it was glued solidly at the factory, soaking the surrounding area with thin CA glue adds another layer of security that can stabilize that joint or extend its life.
Using thin CA glue with a thin, flexible applicator on the spout I apply drops of glue to every joint I can reach in the airframe. Doing this before we start adding components to the plane gives us access to more joints as well as the reverse side of some joints. It takes a little time to put a drop or two of CA on the joints we can reach but it is well worth the effort.
The firewall and surrounding area on the QQ YAK 54 35CC ARF used for this series of stories came fully fuel proofed but many are not so well prepared. When in doubt I mix up a batch of 5-miunte epoxy and then thin it with alcohol to brushing consistency. Then I can use a cheap acid brush to cover the entire firewall area as well as the surrounding bare wood surfaces with the epoxy. I also like to coat the inside of the motor box including any gusseting there to further protect this critical area.
We will never have a better time to perfect the covering on our planes than before any assembly. I have learned the hard way that taking the time before assembly to go over the seams and edges, then going over all the covering with my heat gun can save a ton of work and frustration later.
I use my Hangar 9® ProSeal Covering Iron, set to a medium heat, to go over all the seams be sure they are firmly stuck down. When the seams go through an inside curve I have found that a wadded-up piece of paper towel soaked with water to press down the heated covering behind the Hangar 9® ProSeal Covering Iron to instantly cool it and bond it to the surface.
One of the real benefits of tending to the covering prior to assembly is having clear access to the hinge lines where covering can start loosening up later, especially if an edge or seam was not fully sealed prior to assembly. It only takes a few minutes to get the hinge lines fully sealed but this effort can save a bunch of frustrations later. You decide.
I know, when that new plane arrives our “get it done” hormones go full throttle but that can lead to everything from a small annoying failure to a preventable disaster. I’d like to say that I have not given in to the building blitz to get the new plane in the air but alas, I also am human. But, when one of those high-speed assembly binges led to a major failure and a totaled plane that I could have prevented I saw the light, so to speak. More specifically I saw the value of taking some time before assembly to check the plane over thoroughly and to do some pre-assembly preparation. Since then I have not had a maiden flight failure.
When doing this story, I shot the video and photos of the entire procedure in under three hours. Nothing in this procedure needs new expensive tools. The real investment is our time and I write that off to smart, potentially plane-saving assembly. Now when I start installing the components I know that the airframe is ready and safe. And that is worth a bunch of money to me.
Have a comment on this story? –Email Me!