

People told me the DA50 would be too much power but I never heard of such a
thing, but they were right.
Text, photos and video by Tom Hintz
Posted - 3-16-2015
This phase of the build is where things get hectic. Things like the gas tank, batteries and Smart-Fly PowerExpander Sport Plus board have to be installed but before I can nail them down I have to make a good guess and start checking the CG. The idea is to hit the prescribed CG point without having to add additional weight. It turns out that my first guess was the right one!
I know some consider flying wires on model planes to be more for show rather than structural integrity. On the Bill Hempel ¼-scale L-4 Grasshopper the flying wires are functional and care must be taken to get them right or the flying characteristics can suffer and worse, the plane can crash.
First I bent the attachment plates included with the Bill Hempel ¼-scale L-4 Grasshopper kit to 45-degrees and mounted them to the hard points that were factory installed in the tail feathers. To be totally frank, the included flying wire hardware was less than impressive so that was tossed and I picked up a Sullivan tail wire kit and used that.
The Sullivan wires are soldered and give a cleaner look when installed. Because the soldering replaces the crimped wire securing system I think building these flying wires is actually easier. I had the Sullivan kit installed in around a half hour. I think this is a great upgrade that will make the Bill Hempel ¼-scale L-4 Grasshopper a safer, more consistent plane to fly, especially over the long term because I do not plan to baby this plane.
I used HiTec HS 5665MH servos that give me 139 ounces of torque at 7.4V. These are digital, programmable servos that make setup easier because I can tweak them as I install them using my Hitec HFP-25 Digital Servo Programmer & Tester before I install the receiver and the other radio gear.

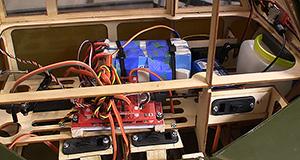
The interior was beginning to get crowded
as I installed radio gear.
Hangar-9 aluminum servo arms were used with single 1.5” arms on the ailerons and elevators and a double, 3” arm on the rudder. I have had very good luck with these arms with no bending or distortions even though I really like to bang the sticks around when I fly. Remember that the rudder servo arm must be the same width as the connection points for the pull-pull cables at the rudder. If the rudder arm is different in width compared to the rudder the non-pulling cable will go slack every time you hit the rudder.
The aileron linkages were used as supplied and will work fine with the Hangar-9 arms. There were no elevator linkages in this kit so I made some up from the same carbon fiber tubing and titanium ends that I normally use for throttle linkages. The elevator links are rather short so this is a good place to use the super tough carbon fiber system and save a bit of weight in the process.
I had intended to use a RotoFlow tank in the Bill Hempel ¼-scale L-4 Grasshopper but the space available just won’t allow that. I found that a 24 ounce Sullivan rectangular, slant tank would just fit under the “dash” section of the interior and let me locate it further up into the nose area. With the tank placed I was able to run the vent line around the top of the tank and back down to an AeroWorks Fuel Exit Dot on the bottom of the fuse. The carb line goes through its own hole next to the main air hole in the firewall and the fill line goes up to that fitting on top of the nose just ahead of the windshield.
I will be flying the Bill Hempel ¼-scale L-4 Grasshopper with a Spektrum DX8 transmitter bound to a Spektrum AR8000 8-channel receiver. To gain the most safety I am using a Smart-Fly PowerExpander Sport Plus because it offers complete redundant battery systems, each powered by a 7.4Vm 5000mAh LiPo pack. This board also has an optical ignition kill system that uses a 7.4V, 2700 mAh LiPo pack to power the DA ignition module. The fiber optic cable is all that connects the ignition and receiver so there is no chance of passing interference back and forth there. Despite the size of the Bill Hempel ¼-scale L-4 Grasshopper getting all the radio gear installed on the suspended floor in the cockpit area was challenging. With a little trial and error I was able to get everything situated and secured in an arrangement that did not compromise the CG. I had to get creative with mounting the three battery/ignition switches but that to was handled and the electrical heart of my Bill Hempel ¼-scale L-4 Grasshopper was functional and reliable.
The Bill Hempel ¼-scale L-4 Grasshopper windshield is supposed to be glued in place but a fellow I had been talking with about this build screwed his in so he could more easily access the interior. Despite the size of the Bill Hempel ¼-scale L-4 Grasshopper access to the gas tank and other interior-mounted equipment is through the right side door and flip-up window only. I see his point so screwed my windshield in place as well. (This turned out to be hugely important when an ignition plug came apart on the maiden flight and I was able to reach it at the field by taking the windshield out!)
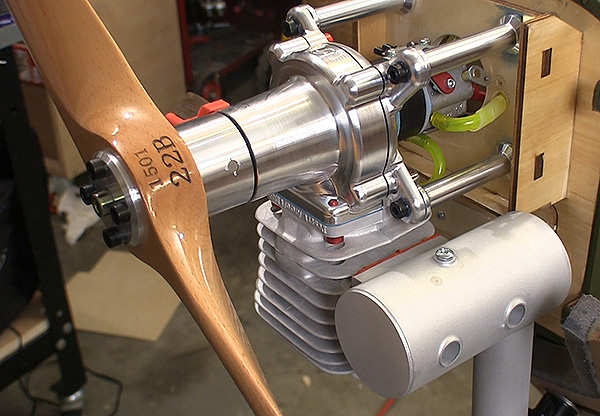
The Saturday I had hoped to maiden the Bill Hempel ¼-scale L-4 Grasshopper on turned out to be rainy so I decided to fire the new DA-50R outside my shop. The motor started so easily it surprised me. I ran it at varying throttle settings for about 20 minutes, making a few very small carb adjustments along the way.
I had to dial in the throttle servo and linkage more than the carb itself but I quickly had the DA-50R running nicely and ready for the maiden flight. I am running the DA-50R on a 40-to-1 mixture of normal unleaded gas and Red Line Synthetic Racing Oil because of the high lubricity this mixture offers and because it was specifically mentioned in the DA instruction sheet. After running several gallons of this mixture through the DA-50R I will probably up the mixture to 50-to-1 using the same oil.
Finally I recharged all of the flight batteries, checked the engine nuts and bolts and went over the servo screws one more time to be sure everything is tight and ready to fly the following day.
Have a comment on this story? –Email Me!