


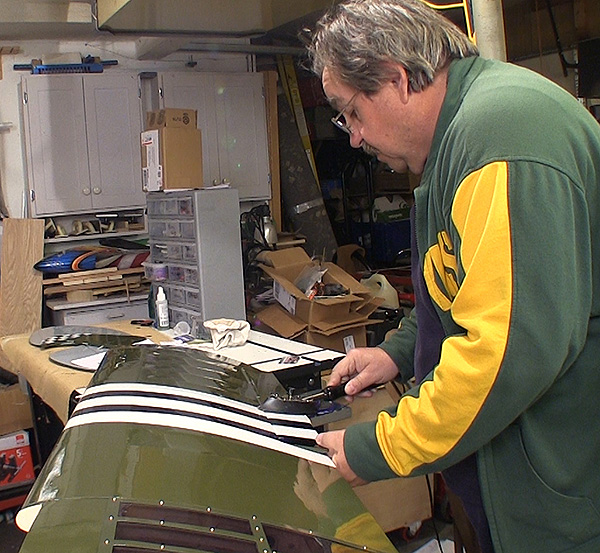
While looking the plane over as i came from the box I also sealed all the edges on
the covering just to be sure.
Part 1 – Unboxing, what’s included, what we need and first assembly
Text, photos and video by Tom Hintz
Posted - 3-3-2015
This review of the Bill Hempel ¼-scale L-4 Grasshopper marks the beginning of a new formula for FlyingRC.net airplane reviews. Rather than do it all in one story and video airplane reviews will be broken in to several segments so I can present much more detail about what I am doing, the products being used and why.
This Bill Hempel ¼-scale L-4 Grasshopper is designed for 30cc to 50cc engines so naturally I want to use power on the upper portion of that range. This plane has a 105” wing span, is 72”-long overall and has a projected flying weight of 14 pounds. The Bill Hempel ¼-scale L-4 Grasshopper is available in three sizes, 25%, 40%, and 60% from Bill Hempel’s’ web site.
Because this plane does not have flaps we only need 6 servos rather than 8. Considering the wing area and overall weight, flaps are not needed so why add the weight and complexity. In researching the Bill Hempel ¼-scale L-4 Grasshopper every current owner I contacted raved about its flight characteristics including when overpowered. That pretty much cinched the deal for me as I wanted a Cub-style plane as well as a warbird for restricted fun flies. The Bill Hempel ¼-scale L-4 Grasshopper fits my needs on all levels.
The Bill Hempel ¼-scale L-4 Grasshopper came double-boxed and the fuse, tail feathers and wings all wrapped in plastic bag and a layer of thin foam. The result was zero shipping damage to anything. The only damage I could find was a small split in the covering on one landing gear leg and that was easily fixed with covering scraps from opening servo holes.
The covering on the Bill Hempel ¼-scale L-4 Grasshopper is nothing short of remarkable. I did go over the seams to be sure they were bonded well and did have to tighten the covering in one spot on both ailerons but that was it. The only note I have about the covering aside from looking great is to be careful with covering irons and heat guns. With my covering iron set a bit under half of its heat capability the covering seals and shrinks very quickly. Too much heat on this covering could cause more problems than it fixes.
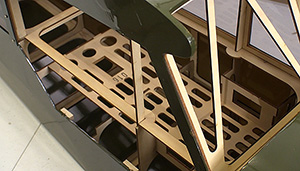
Most of the hardware comes bagged in groups for specific tasks which helps because the Bill Hempel ¼-scale L-4 Grasshopper does not come with an instruction manual and at this writing, (3-1-2015) none exists on the Bill Hempel web site. Hempel does have manuals for the larger Cubs that are similar but even those instructions assume that you know a lot about these planes. However, if you have built other giant scale planes most of the parts and pieces will be familiar and they are installed just as they are on other big planes. If you are new to bigger planes, getting the help of someone with this kind of experience will be your saving grace.
Despite the large interior I would have to
plan the layout of the equipment to
maximize the space usage.
The first procedure was to install the horizontal stabilizer. To do this I put the carbon fiber wing tube in place and made sure that it was centered. There is a small piece of balsa at the end of the horizontal stabilizer slot that I cut out with a razor saw. The stabilizer probably would go in without removing this piece but I find it easier to get it in without getting epoxy all over everything without it.
After centering the stab I measured from the ends of the wing tube to the outside edges of the stab and repositioned it to get those dimensions equal. Then I marked the covering at the fuselage on the top and bottom of the stab so I could cut that away to expose the mating wood surfaces. At this point you can “sight” down the plane to see if the stab is level with the wing tube. If the stab is not aligned with the wing tube sand the stabilizer saddle slightly to correct it.
Once satisfied with the position of the stab I applied 30-minute epoxy to all of the surfaces, slid the stab into position, measured to be sure it was square to the wing tube. I noticed that the stab was still slightly crooked to the wing tube horizontally so used a piece of masking tape to hold one end of the stab up while the epoxy set up. There will be some excess epoxy along the edges so I spray that with alcohol and wipe up with paper towels.
The last thing I did in this first step was to install the control horns in the elevators, rudder and ailerons. It is important to get the rudder control horn centered and the screw on brackets in the same position on both sides. It is important that these brackets are spaced to match the mounting points on the servo pull-pull arm being used.
With the fuselage well under way it is time to start ordering parts in. After lots of research I opted for the DA50R 50cc engine. That puts the power at the upper limit but I like to have all the power I can. A 24-ounce RotoFlow tank will supply fuel to the DA engine.
For the electrical system I am installing a Smart-Fly PowerExpander Sport Plus with a regulated ignition cutoff. I need the regulated one because I am using 7.4V LiPo batteries and the DA50R ignition is 6V. A pair of 7.4V, 5000mAh LiPo packs will supply the servos and receiver while a separate 7.4V, 2700mAh pack will power the ignition. Three heavy-duty switches with charging jacks will control all three battery packs.
I will be using a SpeltrumDX8 transmitter and an AR8000 Spektrum 8 channel receiver with a satellite receiver for added signal security.
See this plane on Bill Hempel’s site – Click Here
See Segment 4
Have a comment on this Review? –Email Me!