


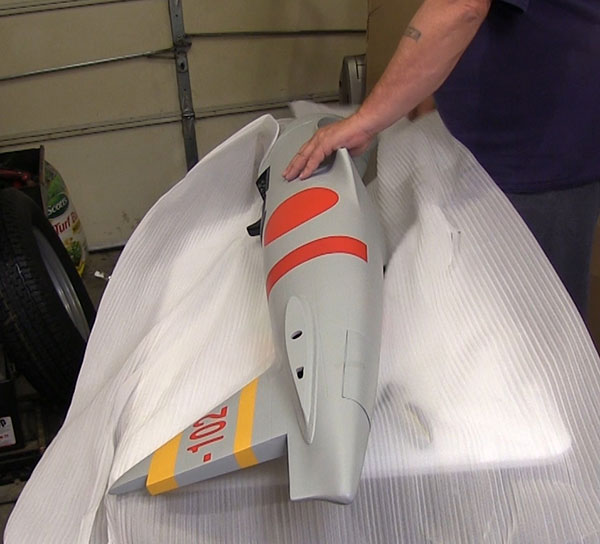
The Zero arrived in good condition thanks to lots of careful packing.
Text, photos and video by Tom Hintz
Posted - 9-4-2015
Many of you know that I had planned on building a Top-Flite Giant Scale P47 Razorback but the loss of the last major financial sponsor of my sites forced the project to be scaled down somewhat. However, I am happy to be building an ESM 88” Zero which should be a good flying plane. This will still be a relatively expensive build to do properly.
The ESM (Ever Soaring Models) Zero has an 87.8" (2230 mm) wing span and is 69" (1760 mm) long. The wing has 8.3sq. ft (72.2 sq dm) of area and with the 18.7 lbs (8.5 kg) weight (no retracts) the wing loading is a stout 36 oz/sq. ft (110 g/sq. dm). War birds have never been known to be “floaters” and I expect the ESM 88” Zero to fit that flight profile to some degree. I am going to lighten the ESM 88” Zero up where I can safely. More importantly, seeing as this model is rated for 30cc to 50cc engines I decided to hang my DA50R 50cc on the ESM 88” Zero to take a lack of power out of the equation. I know some will all this cheating or “out of scale” but it is my plane and I go for more power when weight vs. wing is an issue.
The wings and horizontal stabilizers are built-up balsa and light plywood covered with a matte finish MonoKote. The fuselage and cowl are made from fiberglass or some similar resin material. These components are not light by any means but not exceedingly heavy either. I did notice that the steel rods they supply for the aileron and flap linkages are heavy and will be replaced with custom made carbon fiber rods and ball links.
The ailerons and elevator halves are mounted using CA hinges. Those are going away in favor of heavy-duty DuBro flat hinges. The flaps come with flat hinges but those will also be replaced with the heavy-duty DuBros’ just for a little more security. The rudder comes with two simple pin hinges and those will be replaced with more rugged DuBro flat hinges just to be safe.
This is where I first noticed the really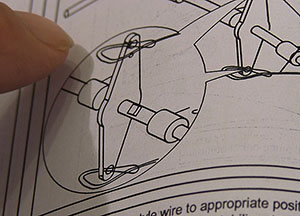
stupid idea of looping steel cables
through a steel hole and hoping nothing
bad would happen.
Control of the rudder, elevator and tail wheel are designed for pull-pull setups with steel cables and related hardware supplied in the kit. Then I noticed that the instructions call for simply looping the steel cable through the steel control horns in the tail which means I will be doing it differently because that type of connection is both guaranteed to fail eventually and just dumb all of the time.
Another thing I am not pleased with is that the rudder and tail wheel are separate mechanisms but driven by the same servo. After talking with a friend who has this same plane I will use the stock rudder and tail wheel mechanisms but will operate them through after-market Sullivan solder-type pull-pull cables and DuBro ball links.
Something else that surprised me is that the elevator halves are both operated by a u-shaped steel wire like I used on my old Ringmaster control line planes 40 years ago. Like the rudder and tail wheel the elevators have a steel pull-pull control horn set meant to be driven with steel cable looped through them. The designers at ESM might be short sighted in terms of control durability but they are consistent. Sullivan pull-pull cable components and ball links will be used here also.
I know that I will get email from folks who have used this loop idea and have not had a problem and I will be glad to hear that. I don’t trust these connecting ideas and won’t fly the ESM 88” Zero without putting in components that I know to be as safe as can be.
During the ESM 88” Zero build I am going to be looking at a new (to me) line of adhesives. Epo-Grip has been strong in the furniture industry for 30 years or so but remains somewhat of a secret in RC flying. I have a friend who has been using the Epo-Grip epoxies with good results so they will be used for this build exclusively.
In addition to tough, dependable strength the Epo-Grip epoxies are generally thicker, more of a paste that stays where you put it. If you have spent time trying to clean up epoxy runs or getting enough of it to stay on the joint the staying power of the Epo-Grip products will be of major interest.
The next segment of the ESM 88” Zero build will focus on getting the control surfaces installed. Part of that will be putting in the rudder, elevator and tail wheel hardware that must precede the control surfaces themselves. The horizontal stabilizers also have to go on in this portion of the build so the ESM 88” Zero will start looking more like a Zero right from the start.
I can say that I will be using my DA50R engine from the YAK, HiTec servos and a Spektrum Power Safe receiver. We will look more closely at all of the components used as they are installed.
Stay tuned!
See the ESM 88” Zero web page – Click Here
Have a comment on this Review? –Email Me!