


Typical of giant war birds the wing comes in halves that we have to
join with a wooden"joiner spar" and a bunch of epoxy.
Text, photos and video by Tom Hintz
Posted – 9-16-2015
Since we have to permanently join the wing halves on the ESM 88” Zero there is some work to be done before that procedure to avoid loud, objectionable language coming from our shop later on. In addition to access much of this work is more easily done with the wing still in halves.
Since I will be installing electric retracts I need to cut the covering from the full landing gear bays. I took the time to cut the covering inside of the bay edges by 1/8 to ¼ inch and iron the edges down to the inside edges of the bays. The plastic wheel housings actually overlap the edges of this opening but ironing the covering down around those edges helps nail the covering down for when I shrink out wrinkles months and years down the road.
The servo doors also have openings for the linkage arms and we need to cut that out also. Before cutting those openings I iron the covering down all around the opening to be sure it is stuck well. The toughest part of prepping the servo doors is getting the #@&%$# cellophane tape holding them off of the covering. And after you get that tape up it leaves a sticky film on the covering that I removed with Simple Green and a bunch of scrubbing.
Something else the manufacturer failed to do is put strings through the bays to pull servo wires. We also have to cut the exit holes near the root ends of the wing panels. Again, this is no big deal if we handle it now. The instructions recognize the need for the exit holes to bring the wires out in step 17, right after step 16 where you epoxy the wing halves together and make it all but impossible to get pull strings through. This is one of those times when reading ahead in the instructions can be a lifesaver. Also in step 17 they mention pulling a fuel line along with the servo wires but I suspect they meant an air line for air powered retracts.
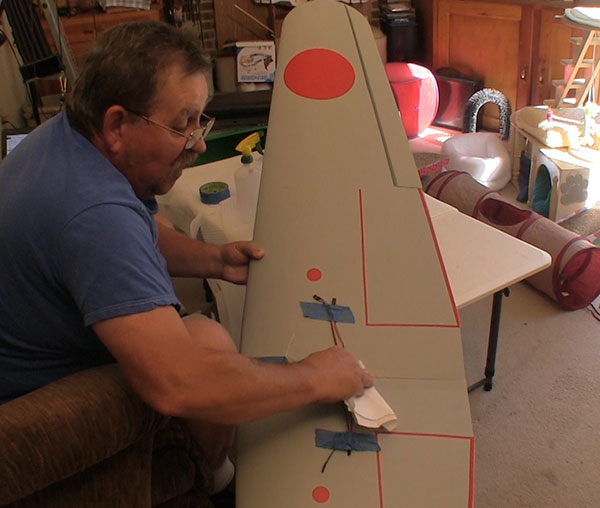
There were no strings int he wings for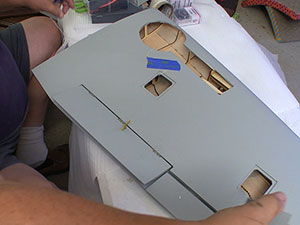
pulling servo leads so I had to fish my
own through.
As I prepped the servo doors I attached a spring clip to some extra yarn I got from the wife and dropped that down through the wing structure. I cut a hole near the root of each wing (top side) where it will be inside of the fuselage when assembled. After bringing the yarn out through the holes I taped it to the wing and labeled “A” for aileron. I did the same for the flap servos, marking those strings with an “F” for flaps. I also wrap a piece of blue masking tape around the aileron wire on all of my flap-equipped planes as another way to prevent getting aileron and flap cables mixed up during assembly.
I cut a separate exit hole for the retract wires and added a pull a string in each wing even though that hole might be accessible until I permanently install the wheel wells. At this writing there is an unknown delay in getting the Robart Retracts so I might be doing the initial flights using the fixed gear. I just need to keep my options open for after the wing halves are joined.
I used the 4 to 5 hours set time Epo-Grip epoxy for installing the DuBro hinges. In addition to the long working time the consistency of this Epo-Grip means we don’t have to worry about it dripping or running before it sets up. I think I am going to love this kind of epoxy!
There will be a little learning curve to how much to mix. When you just scoop it out with a pallet knife (or similar) the quantities just look different so I wound up mixing way too much the first time. Also the folks at Epo-Grip recommend folding the two parts of this epoxy together rather than just stirring it. You do get a more thorough mix faster by folding it back over itself and that is no harder to do. I just have to remember to do it. Also, the thick consistency means we do not need the little cups to mix the Epo-Grip epoxy in. A flat piece of cardboard works great and when we are building an airplane chances are we have lots of spare cardboard in the shop.
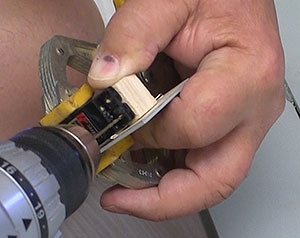
We have to build the servo bosses in
the wings which gave me the chance to
toughen those mounts.
Once again I am using all HiTec servos in the ESM 88” Zero. The ailerons and flaps are driven by HS-5665MH digital high voltage (7.4V) servos that generate 139oz/in of torque at the higher voltage. These servos also feature metal gears, dual bearings and can be programmed, something I have come to love about modern digital servos.
The servos are secured to the servo doors with wooden blocks we have to glue to the inside surface of the doors. Once again I turned to the long set Epo-Grip epoxy to give me ample time to assemble all four doors. We can also use the end of the pallet knife to add a small fillet of epoxy to further secure the servos to the doors. I know people will complain about having to install these blocks but I had a factory installed servo mount fall apart once. I’d rather take the time to do it myself.
I used Hangar 9, 1-1/2” aluminum servo arms on the ailerons and flaps. These are probably overkill for this kind of plane but there is a huge safety margin there and I just feel better with them in place. I was hoping that the length would give me some wiggle room when dialing in the control surface throws. I like to get all of the deflection available to me because it is always easier to dial it down if need be but so far everything I fly stays at full throw.
The included steel control rods for the flaps and ailerons were replaced with tubular carbon fiber rods with titanium 4-40 ends from Central Hobbies. When assembled with the 24 hour version of JB Weld you get a very light but very stiff control linkage with zero play.
An important part of making these linkages is to tape the ends in place while the JB Weld cures. Trapped air within the tubes will slowly push the ends out somewhat if they are not retrained. I just wrap masking tape around the ends and that prevents this unwanted expansion.
While installing the linkages I centered the servos and adjusted each linkage to approximate a neutral setting. Later I can use the radio or my HiTec HFP-25 Digital Servo Programmer to set the travels and refine the centering.
I used my favorite carbon tube linkages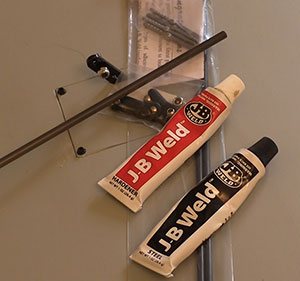
that I make up with JB Weld 24-hour set
time for max strength.
Because I am still waiting on the retracts the wheel wells have been left out for now to give me access to the landing gear area when installing them later. I may have to use the included fixed gear for the initial flights if the retracts don’t make it in time.
While normally a messy job, joining the wing halves using the Epo-Grip Paste epoxy was easy and produced no drips at all. I love the consistency of this epoxy because you spread it on the parts like you would peanut butter and then it stays where you put it. With all other epoxies I have used there is going to be dripping and running while you coat the other side of the joint and after you assemble it. With the Epo-Grip I applied a good coat to both pieces and assembled them with no mess at all.
After the halves were assembled I wet a paper towel with alcohol and wiped away the squeeze out, smoothing the joint at the same time. Because I was not concerned about the epoxy running before it set I just stood the assembled wing against the wall and came back several hours later. There was no evidence of the epoxy moving at all but the wings are forever joined.
The ease of application, the total lack of running or dripping combined with the apparent super strength of the joint means I have zero reason to use any other type of epoxy for any future plane/woodworking or any other project needing epoxy. The Epo-Grip products have become the “house brand” at FlyingRC.net and NewWoodworker.com.
Next up I start on the fuselage. The tail feathers and related linkages look to be the biggest challenge of this build but you never know. I plan to take it one step at a time while hoping it is easier than anticipated…Stay tuned!
Have a comment on this Review segment? –Email Me!